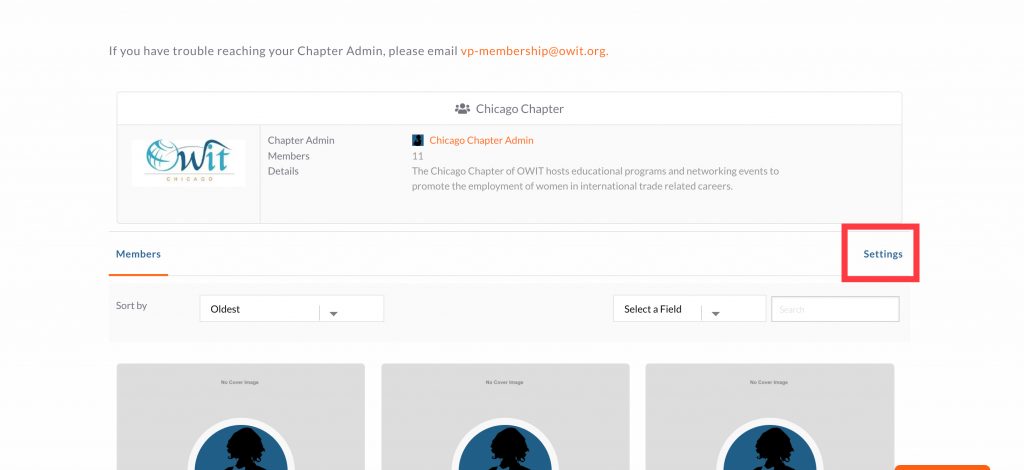
1. Click on Settings in the upper right corner of your Chapter Admin screen.
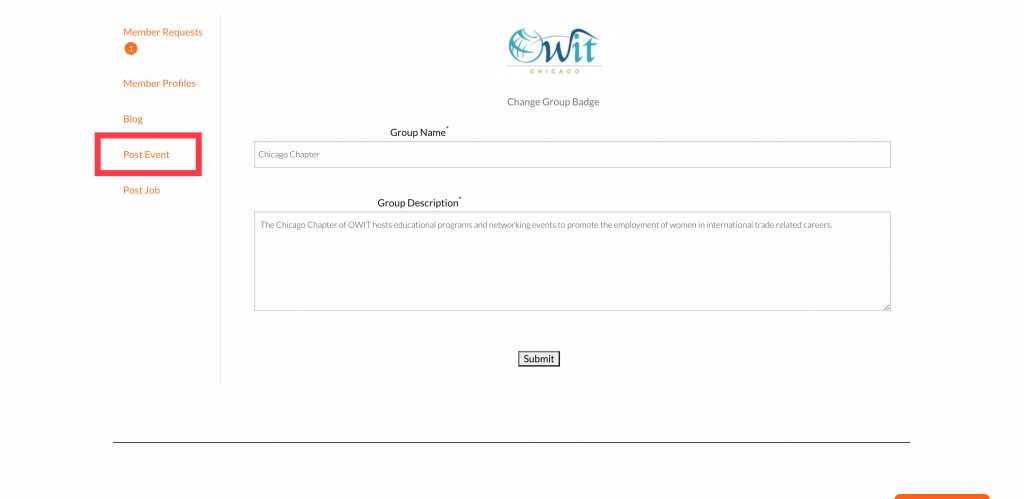
2. Click on “Post Event” located in the left tab bar
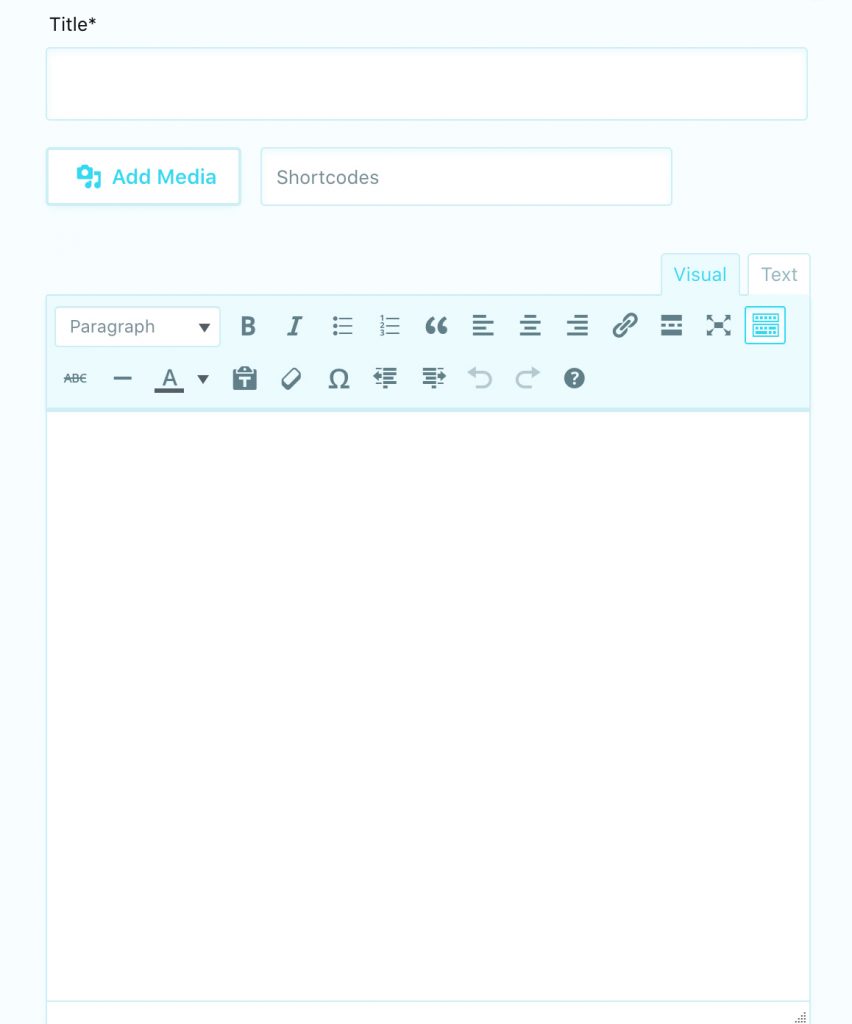
3. Fill in the title and event information: Include the title of the event under Title and include the description/details of the event in the box below the title box. If you wish to include images, click on “Add Media” located above the description box.
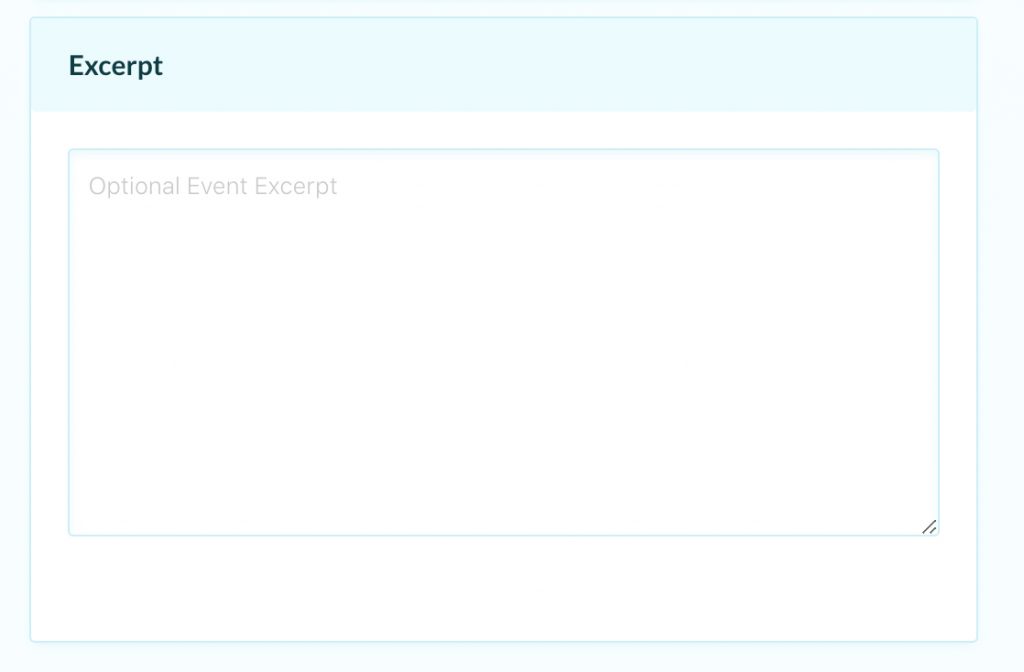
4. Excerpt: Include a short (1 to 2 sentence) excerpt of the event.
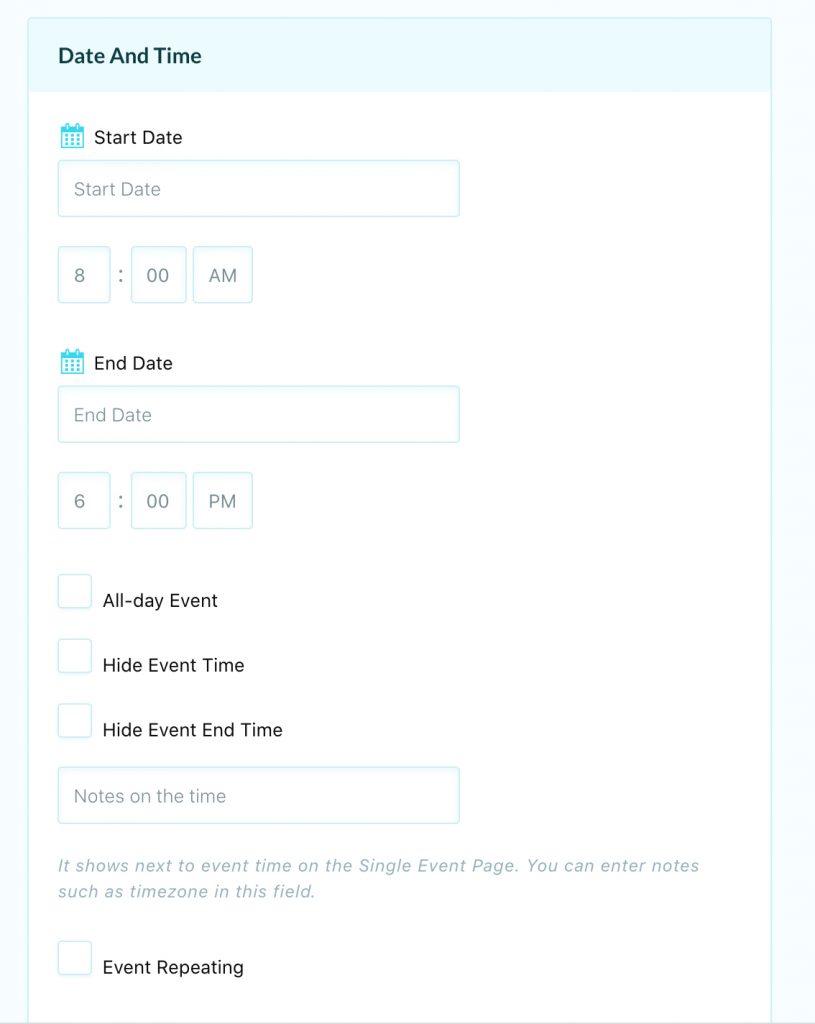
5. Date And Time: Enter the start and end date and time of the event. Enter the time zone of your event in “Notes on the time” box. If the event is a recurring event, click “Event Repeating” and enter details for subsequent events.
If the event is ongoing:
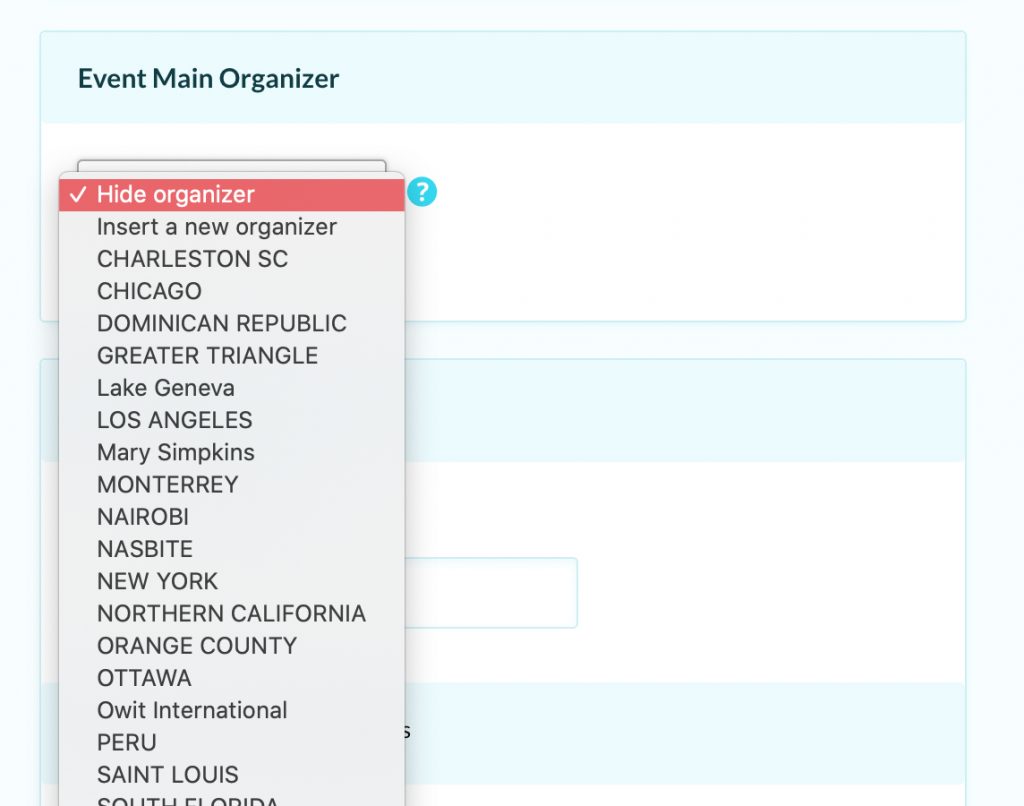
6. Event Main Organizer: Select your Chapter as the main organizer.
7. Total Booking Limit: Check “Unlimited” if there is no limit to the number of individuals that can register. If there is a limit, place the number of available registration slots in the line below the unlimited button.
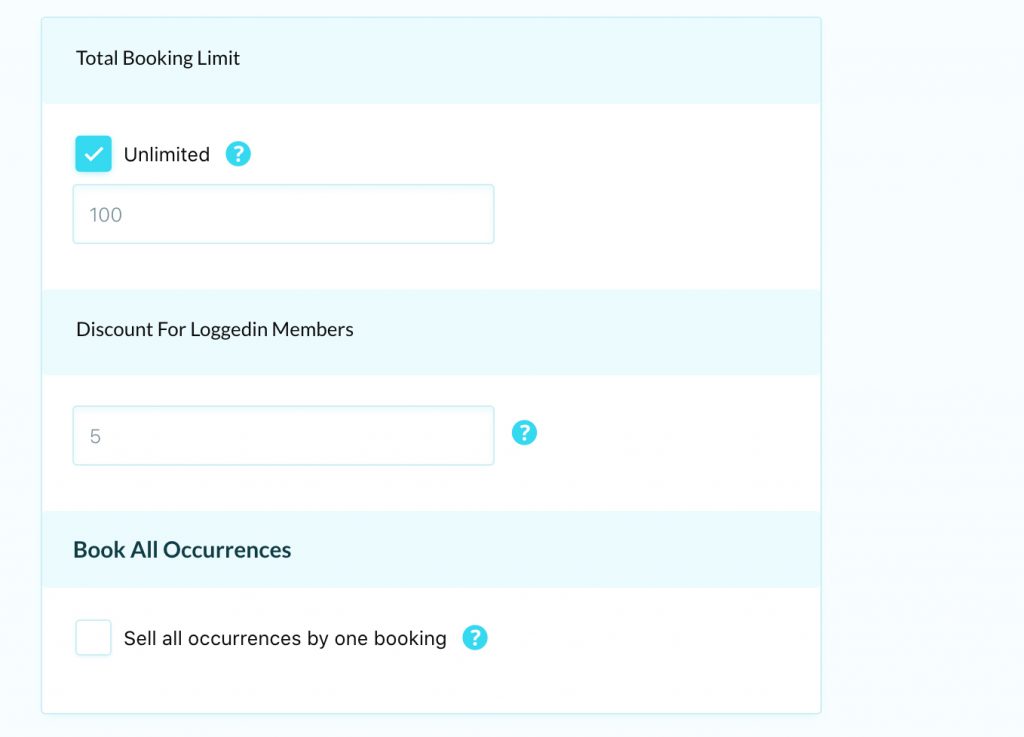
8. Discount for Members: Leave blank because registration for your event will be via your chapter’s website. See Step 12 for how to post member discounts.
9. Book All Occurrences: If the Event is an ongoing/weekly/monthly event and you selected Event Repeating in Step 5, then select Book All Occurrences, and all future events will be published with the information provided on this one form. Please note, you will not be able to go back and update. You would need to contact the OWIT Intl Admin to edit/update your posted events.
10. Registration/Booking Form/Organizer Payment Credentials: Leave blank because registration for your event will not be processed on OWIT Intl’s website.
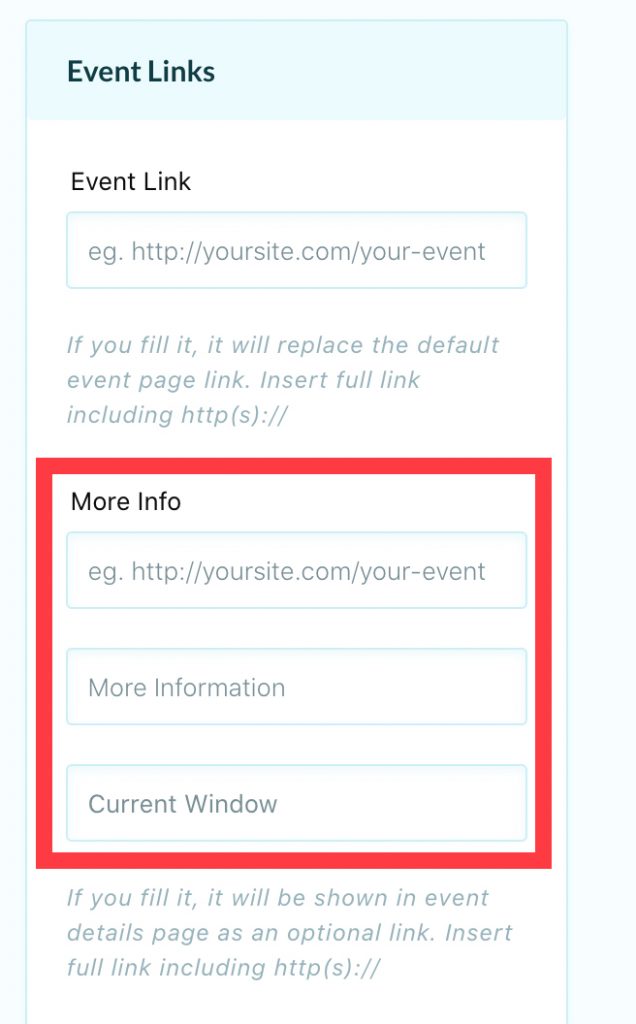
11. Event Links: Leave “Event Link” blank and fill the “More Info” box with the link to your event information/registration. This will have users register through the OWIT Site. This is the location to which registrants will be re-directed to register for the event. Click “New Window” for the event/registration page to open in a new window.
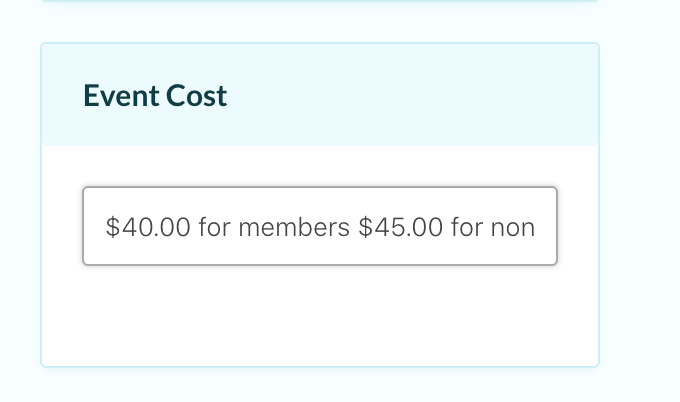
12. Event Cost: Enter the pricing of the event for OWIT Members and Non-Members.
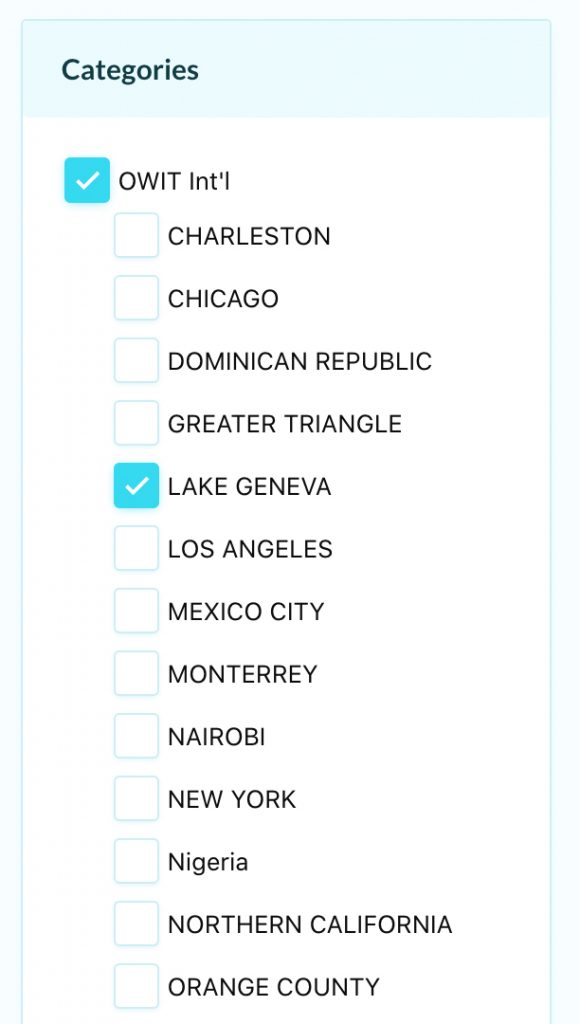
13. Categories: Select OWIT Int’l and the name of your chapter from the list.
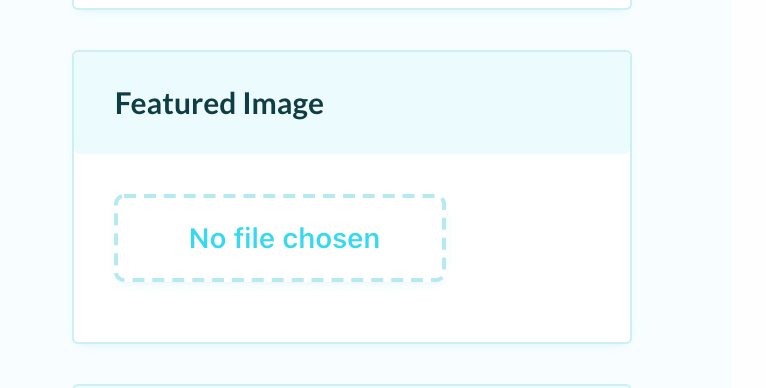
14. Featured Image: This is the main image of the event and will appear on the home page and events pages. The image should be saved on your computer. Click on “No File Chosen” and your file finder will open. Select the image file (.jpeg) (300MB or smaller).
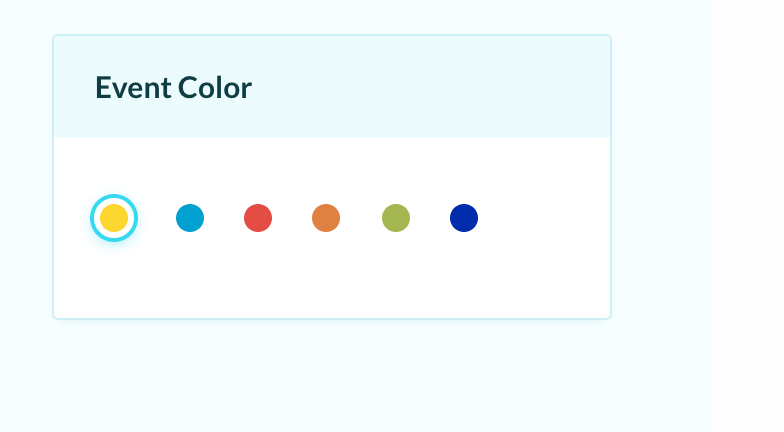
15. Event Color: Select a color for the date banner on the image on the home page and event pages.
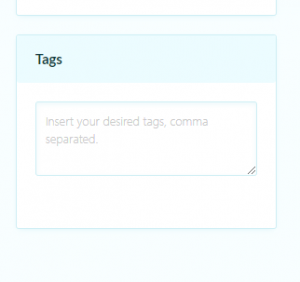
16. If the event is an owit event that requires registration through Owit’s website, Add the tag OWITINTL
17. Once all information has been entered, scroll to the bottom of the page and click “Submit”. You will receive an email once your event has been approved by the OWIT Intl Admin and has been published on the website.